Replacing a bolt or fastener requires precision. Measuring thread specifications accurately ensures your replacement fits securely and performs as intended.
This guide walks you through the essential steps to measure bolt threads, determine pitch, and select the correct replacement fasteners for your application.
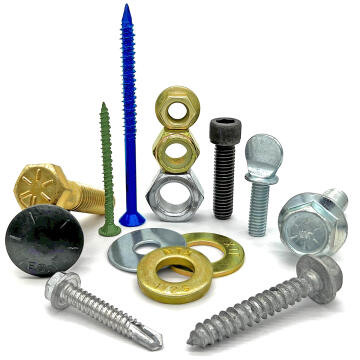
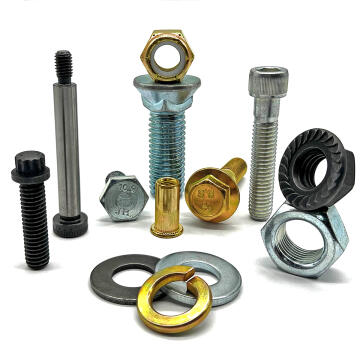
Step 1: Identify Thread Type
- Coarse threads (UNC) – Wider spacing between threads, faster installation, common in general-purpose applications
- Fine threads (UNF) – Tighter spacing, higher clamping force, preferred for precision assemblies
- Metric threads – Measured in millimeters, standard in most international applications
Thread type determines compatibility and performance. Mixing types will result in poor fit and potential failure.
Step 2: Measure Bolt Diameter
- Use a digital or dial caliper for accuracy
- Measure across the outer edges of the threads (major diameter)
- If a caliper isn't available, compare against a reference bolt of known size
Diameter is the foundation of your specification. Even a small deviation can prevent proper threading.
Step 3: Determine Thread Pitch
- SAE/Imperial bolts – Count threads per inch (TPI) using a thread gauge or ruler
- Metric bolts – Measure the distance between thread crests in millimeters
- Thread pitch gauges or sample bolts simplify this measurement
Pitch directly affects how the bolt engages with nuts or tapped holes. Incorrect pitch creates loose or cross-threaded connections.
Step 4: Measure Bolt Length
- For hex bolts, measure from the underside of the head to the tip
- For countersunk or carriage bolts, measure the full length including the head
- Length affects clamping depth and assembly fit
Step 5: Verify Material and Grade
- Match the original bolt's material (steel, stainless, brass, etc.)
- Confirm grade or strength rating for load-bearing applications
- Consider corrosion resistance for outdoor or high-moisture environments
Common Measurement Mistakes
- Estimating pitch or diameter instead of measuring
- Confusing coarse and fine thread specifications
- Overlooking material compatibility and environmental factors
- Neglecting to account for bolt head style and clearance requirements
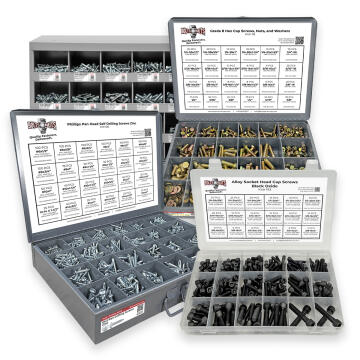
Finding the Right Replacement
Once you've gathered your measurements, filter our inventory by diameter, thread pitch, length, and material. Verify compatibility with your nuts or tapped holes before ordering. Keeping spare fasteners on hand ensures you're prepared for future repairs and projects.
Conclusion
Accurate thread measurement is the difference between a secure, reliable fastener and a failed connection. Take time to measure diameter, pitch, length, and material specifications, and you'll select the perfect replacement every time.
Replacing a bolt or fastener requires precision. Measuring thread specifications accurately ensures your replacement fits securely and performs as intended.
This guide walks you through the essential steps to measure bolt threads, determine pitch, and select the correct replacement fasteners for your application.
Step 1: Identify Thread Type
- Coarse threads (UNC) – Wider spacing between threads, faster installation, common in general-purpose applications
- Fine threads (UNF) – Tighter spacing, higher clamping force, preferred for precision assemblies
- Metric threads – Measured in millimeters, standard in most international applications
Thread type determines compatibility and performance. Mixing types will result in poor fit and potential failure.
Step 2: Measure Bolt Diameter
- Use a digital or dial caliper for accuracy
- Measure across the outer edges of the threads (major diameter)
- If a caliper isn't available, compare against a reference bolt of known size
Diameter is the foundation of your specification. Even a small deviation can prevent proper threading.
Step 3: Determine Thread Pitch
- SAE/Imperial bolts – Count threads per inch (TPI) using a thread gauge or ruler
- Metric bolts – Measure the distance between thread crests in millimeters
- Thread pitch gauges or sample bolts simplify this measurement
Pitch directly affects how the bolt engages with nuts or tapped holes. Incorrect pitch creates loose or cross-threaded connections.
Step 4: Measure Bolt Length
- For hex bolts, measure from the underside of the head to the tip
- For countersunk or carriage bolts, measure the full length including the head
- Length affects clamping depth and assembly fit
Step 5: Verify Material and Grade
- Match the original bolt's material (steel, stainless, brass, etc.)
- Confirm grade or strength rating for load-bearing applications
- Consider corrosion resistance for outdoor or high-moisture environments
Common Measurement Mistakes
- Estimating pitch or diameter instead of measuring
- Confusing coarse and fine thread specifications
- Overlooking material compatibility and environmental factors
- Neglecting to account for bolt head style and clearance requirements
Finding the Right Replacement
Once you've gathered your measurements, filter our inventory by diameter, thread pitch, length, and material. Verify compatibility with your nuts or tapped holes before ordering. Keeping spare fasteners on hand ensures you're prepared for future repairs and projects.
Conclusion
Accurate thread measurement is the difference between a secure, reliable fastener and a failed connection. Take time to measure diameter, pitch, length, and material specifications, and you'll select the perfect replacement every time.